

Setup Local Development Environment
You have a project in the Cockpit and you are ready to build something. This guide walks you through setting up a local development environment so you can create and test a custom Laioutr app on your own machine.
Prerequisites
Make sure you have these before you begin:
- macOS, Linux, or Windows with WSL2. Windows PowerShell and Command Prompt are not supported.
- Node.js 22.12 or newer. We recommend the current LTS release (Node.js 24). Check with
node --version. - pnpm 10 or newer. Check with
pnpm --version. If you do not have it, install it withnpm install --global pnpm; inside the App Starter, pnpm switches to the exact version the project pins. - A Laioutr project created in the Cockpit, and its project secret from project settings.
Setup
Get the App Starter
Download the official App Starter template. It gives you a pre-configured project structure with a playground, Laioutr registration, and conventions already in place.
npx giget@latest gh:laioutr/app-starter
cd laioutr-app-starter
You do not have to use the template, but it gives you a solid starting point. See the App Starter docs for a full breakdown of the project structure.
Log in to the Laioutr npm registry
Laioutr packages come from a private registry. The starter's .npmrc already maps the Laioutr scopes to it — you only need to log in:
npm login --registry https://npm.laioutr.cloud
Approve the login in the browser. npm stores the token in your user ~/.npmrc, so you only do this once per machine, not once per project.
Check that the login worked. Run this inside the project folder — it must print your organization:
npm whoami --registry https://npm.laioutr.cloud
See npm registry for what the authorize screen asks for, and how to authenticate CI instead.
.npmrc. That file is committed to git.Install dependencies
pnpm install
Fetch the project configuration
The laioutrrc.json file is a complete snapshot of your project's frontend configuration: pages, sections, field values, and app settings. It is generated from Studio and used for both local development and production builds. Until you fetch it, the playground runs on placeholder content.
pnpm rc:fetch -p <organization-slug>/<project-slug> -s <project-secret>
- Replace
<organization-slug>/<project-slug>with your project identifier (e.g.acme/storefront). Both slugs are in the Cockpit URL:cockpit.laioutr.cloud/o/<organization-slug>/p/<project-slug>. - Replace
<project-secret>with the project secret from project settings.
Start the playground
The App Starter ships a playground that loads your module together with the project config you just fetched. Use it to develop sections and blocks. It also registers Laioutr DevTools, so you can inspect queries, actions, and resolvers from the same app.
pnpm dev
Open http://localhost:3000.
The playground loads every app listed in laioutrrc.json. If your project uses apps that are not installed yet, pnpm dev stops and names them. Install them with pnpm add -D <app> and start again.
Connect Studio to localhost
Once the playground is running, you can connect it to Laioutr Studio so that changes you make locally appear in the Studio preview. Studio field edits are also reflected in your local app.
laioutrrc.json from. Press Cmd+K (macOS) or Ctrl+K (Windows/Linux) to open the command palette, then run Developer: Use Localhost. Studio will reload and connect to your local dev server.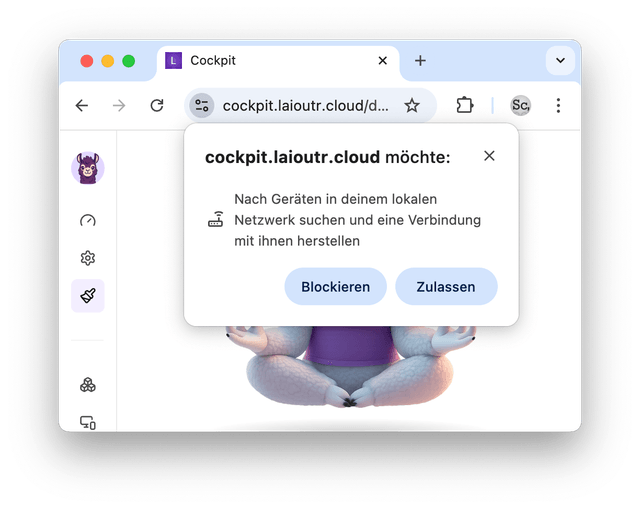 If you clicked Block, open the site settings for
 cockpit.laioutr.cloud (the icon left of the address) and allow local network access. More information is available on the Chrome blog.To switch back, run Developer: Use Remote Host from the same command palette.
Development
With your environment running, you are ready to build. The most important difference between a regular Nuxt module and a Laioutr app is the registerLaioutrApp call in your module.ts file. This is how you register Laioutr-specific functionality.
Adding UI sections and blocks
Register section and block directories in your module.ts:
await registerLaioutrApp({
  /** ... */
  sections: [resolve('runtime/app/sections')],
  blocks: [resolve('runtime/app/blocks')],
});
This scans and registers all section and block Vue files in those folders. Each component needs a definition export so Studio and Frontend Core know how to render and configure it. See App Configuration for details on definitions and config keys.
Adding Orchestr integrations
Orchestr integrations let you connect external services (commerce, CMS, search) to your frontend through a unified API layer.
Register your Orchestr directory in module.ts:
await registerLaioutrApp({
  /** ... */
  orchestrDirs: [resolve('runtime/server/orchestr')],
});
This watches the Orchestr folder for changes and automatically restarts the server when a file is modified.
Troubleshooting
If a step fails, find your error message in Troubleshooting Local Setup.